1. Automatic Installation
Step 1. Download ZIP package from Themeforest and then unzip it.
Step 2. In unzipped folder you will find a folder named “Theme-kuteshop” and 2 archives: “Kutetheme.zip” file and “Sample Data”
Step 3. In your WordPress Dashboard, navigate to Appearance > Themes.

Step 4. Click on Add New, then clicking on Upload Theme and browse the Kutetheme.zip file, finally click Install Now.

Step 5. Wait for a while untill the screenshot below appears, on this form clicking on Activate link to active Kute Theme. Theme has been installed and actived or you also click Live Preview to view this theme.

2. Install Needed Plugins:
Kute theme recommended you use the following plugins:
- Visual Composer – Visual Composer for WordPress is drag and drop frontend and backend page builder plugin that will save you tons of working time on the site content. You will be able to take full control over your WordPress site, build any layout you can imagine – no programming knowledge required. Moreover, now you can choose either work on a backend or move your page building process to frontend and instantly you can see the changes you made.
- Revolution Slider – is a premium plugin( Official Page ) which lets you create stunning full-width, full-screen, normal sliders, all responsive with nice effects.
- Contact Form 7 – Just another contact form plugin. Simple but flexible.
- Kutetheme toolkit – A Toolkit for Kute theme, consist of post types, mailchimp….
- WooCommerce – An e-commerce toolkit that helps you sell anything that you want.
- WooCommerce Variation Swatches and Photos – allows you to configure colors and photos for shoppers on your site to use when picking variations. Notice that you need to purchase this plugin to use for your site, you can follow the link: http://codecanyon.net/item/woocommerce-color-or-image-variation-swatches/7444039 to buy the plugin WooCommerce Variation Swatches and Photos.
- YITH Woocommerce Ajax Prduct Filter – Help you filter the product list without reloading the page
- YITH Woocommerce Compare – allows you to compare more products with woocommerce plugin, through product attributes.
- YITH WooCommerce Wishlist – help you to add Wishlist functionality to your e-commerce.
After installed Kute theme you will be noticed to install required plugins, just follow the instruction you will get all settings.
The installation process may take few minutes, so please be patience. All plugins have been Installed and activated successfully in one -click.
Follow next steps if you want to install sample data like our demo website.
3. Importing Sample Data.
Notice that: Before you import our Sample Data, you need to set up the image size of your product as you want.
You may go to Dashboard=> Woocommerce=> Settings=> Product=> Display, scrolling down to the Product image and setting the size suitable with your site.
Remember to save your setting.

If you arw using the theme to build a new website which doesn`t have content yet, I strongly recommend you to use the demo content files. This theme includes xml data files which will allow you to upload the demo content to your website. The content is the same as in the Live Demo Preview.
3.1 Import Demo content.
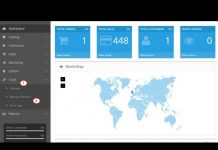
Step 1: Go to Dashboard >>Tools >> Import
Step 2: Click on WordPress to Importer:

Step 3: Install plugin WordPress Importer


Step 4: Click on Choose File button and browse to the folder that you save the file. Find the filename.xml file then click Upload file and import button:

Step 5: Check Download and import file attachments checkbox and select user for post’s author before submit to starts import sample data:

Wait for the importer working until this pop up appear that meant your import completed.


Comments are closed.